

Create Custom Colour Themes on VSCode


It's crucial to feel comfortable in your personal space, and the same applies to your coding environment. Customizing your coding space (VSCode) is key to ensuring maximum comfort while working.
To create your VSCode color theme, there are a few steps you need to follow. First and foremost, it is crucial to have Node.js and Git installed on your computer. Without these, you won't be able to install the necessary packages. So, make sure to have them installed before proceeding. Once you have them installed, you can start with the process of creating your VSCode color theme. Let's dive into it and get started! 🚀
Install the Yeoman (yo) generator using npm.
npm install -g yo generator-code
Installing the Yeoman generator globally on your computer will make it available to all Node.js applications and scripts. However, if you are using a Mac, you may encounter root access issues that could cause the installation to fail. In such cases, you can use the following code to fix the issue: simply run it and enter your password when prompted. After that, you should be good to go!
sudo npm install -g yo generator-code
Navigate to the directory where your theme would be created via the terminal and run the code below
yo code
If you followed the previous steps correctly, then this should work without any issues. If you encounter any problems related to 'command yo not found', it could be due to a failed or incorrect installation of the Yeoman generator.
Assuming everything is working properly, the Visual Studio Code Extension (vsce) generator should be up and running. You can navigate this section using the up and down arrow keys.
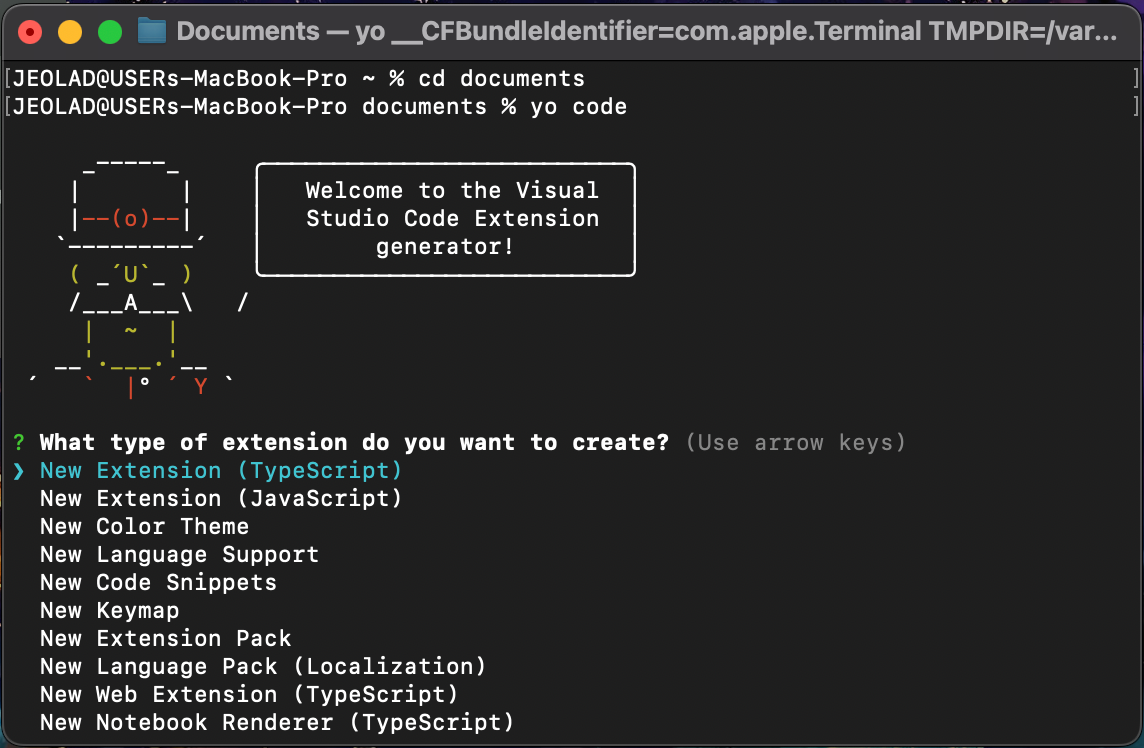
Now, follow these steps
Select New Colour Theme
Select No, start fresh
Give a name to your extension
Enter the identifier of your extension, that is the name of the publisher. You can click enter to use the default value.
Describe your extension. It could be what it means or the inspiration behind it.
Give a display name to your extension. This is the name the users at the Visual Studio marketplace will see.
Select the Base theme.
You can then choose to initialize a Git repository if you have not created one.
At this point, you have successfully created your project. Navigate to the directory of your project using
cd <extension-name>
Then run the code below to open your project on VSCode
code .
When inside your project file, you will find a themes folder with a JSON file containing the themes, open the file, run the debugger, and start customizing.
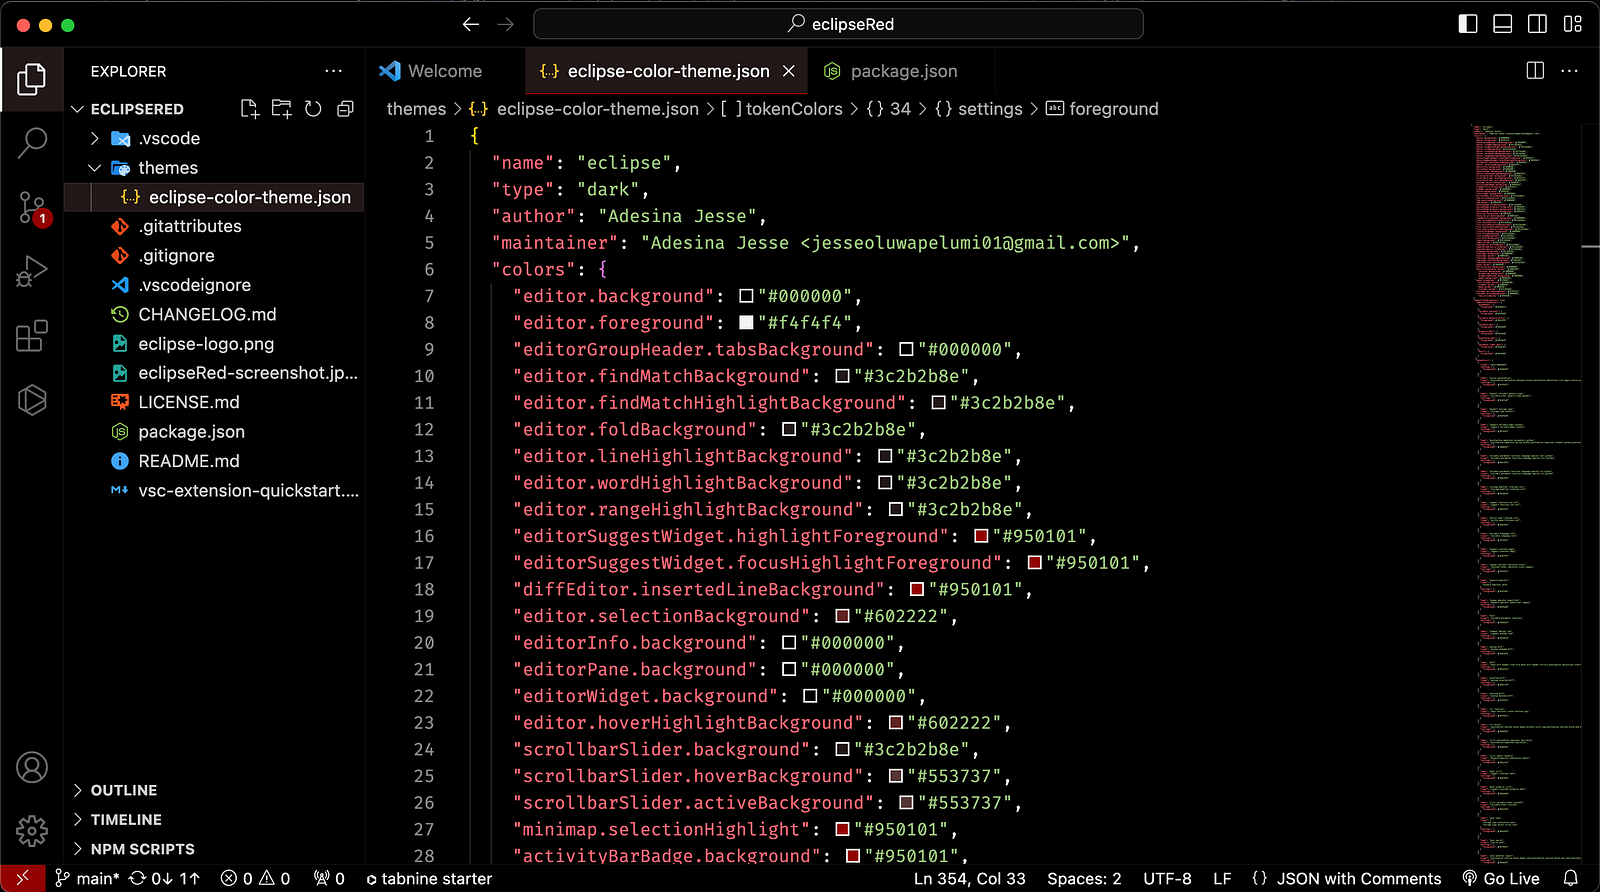
To have more control over your theme and its options, you can refer to the VSCode Theme Colour reference and further customize your theme file.
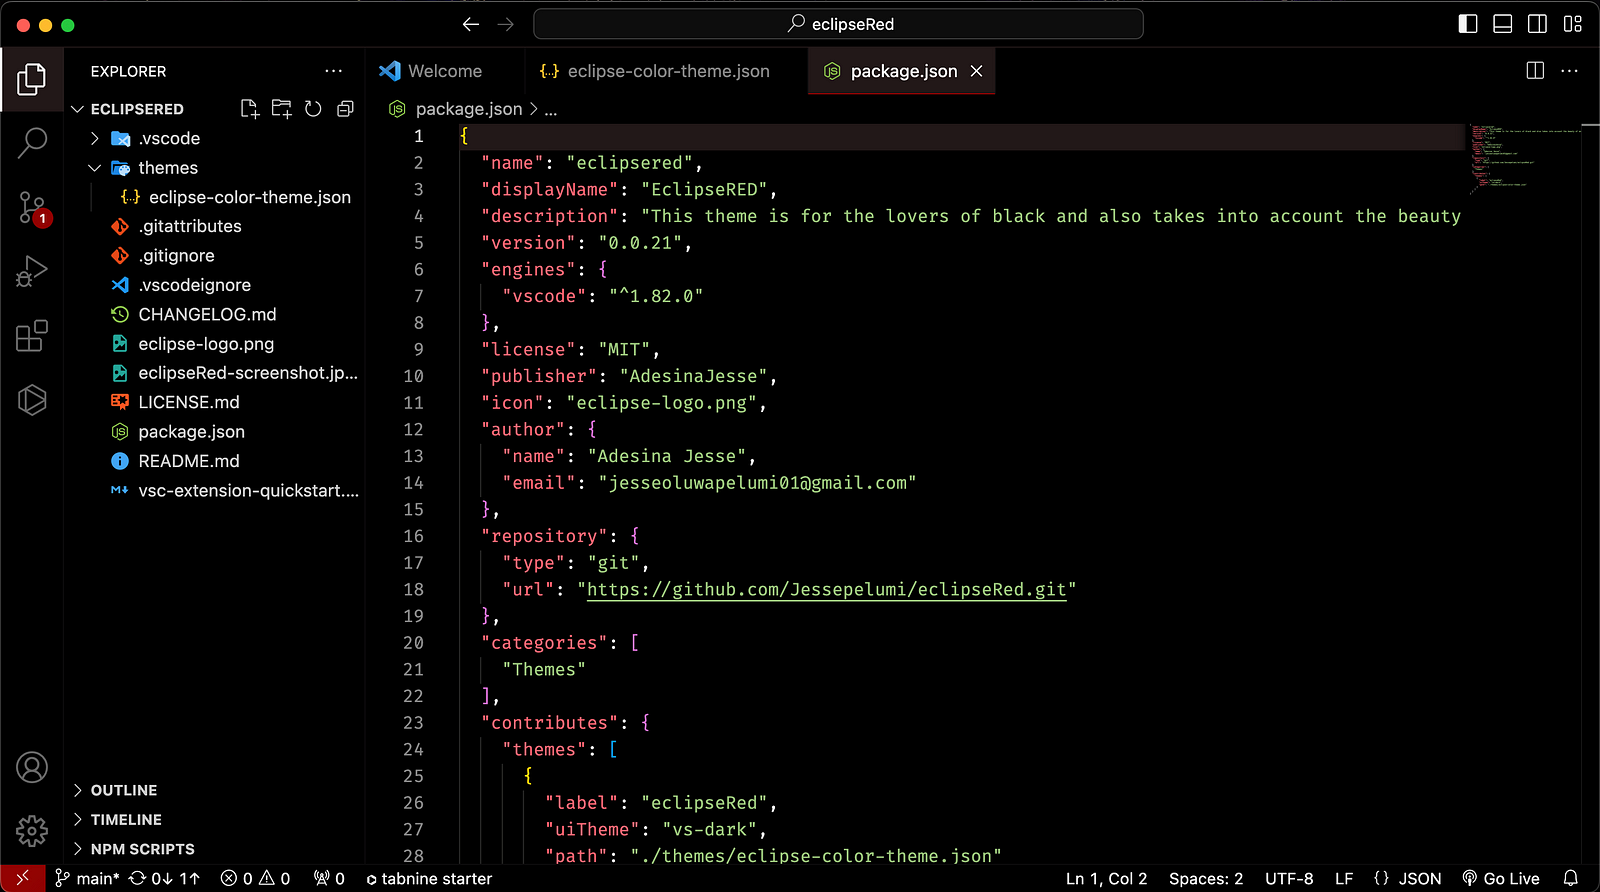
Once you've finished customizing, it's recommended to edit your package.json file by adding a license (MIT), publisher, icon, author (name and email; you may also include your LinkedIn profile), and repository (type and URL).
You can then push your project to your GitHub repository.
To publish your just-created theme, run the code below
npm install vsce -g
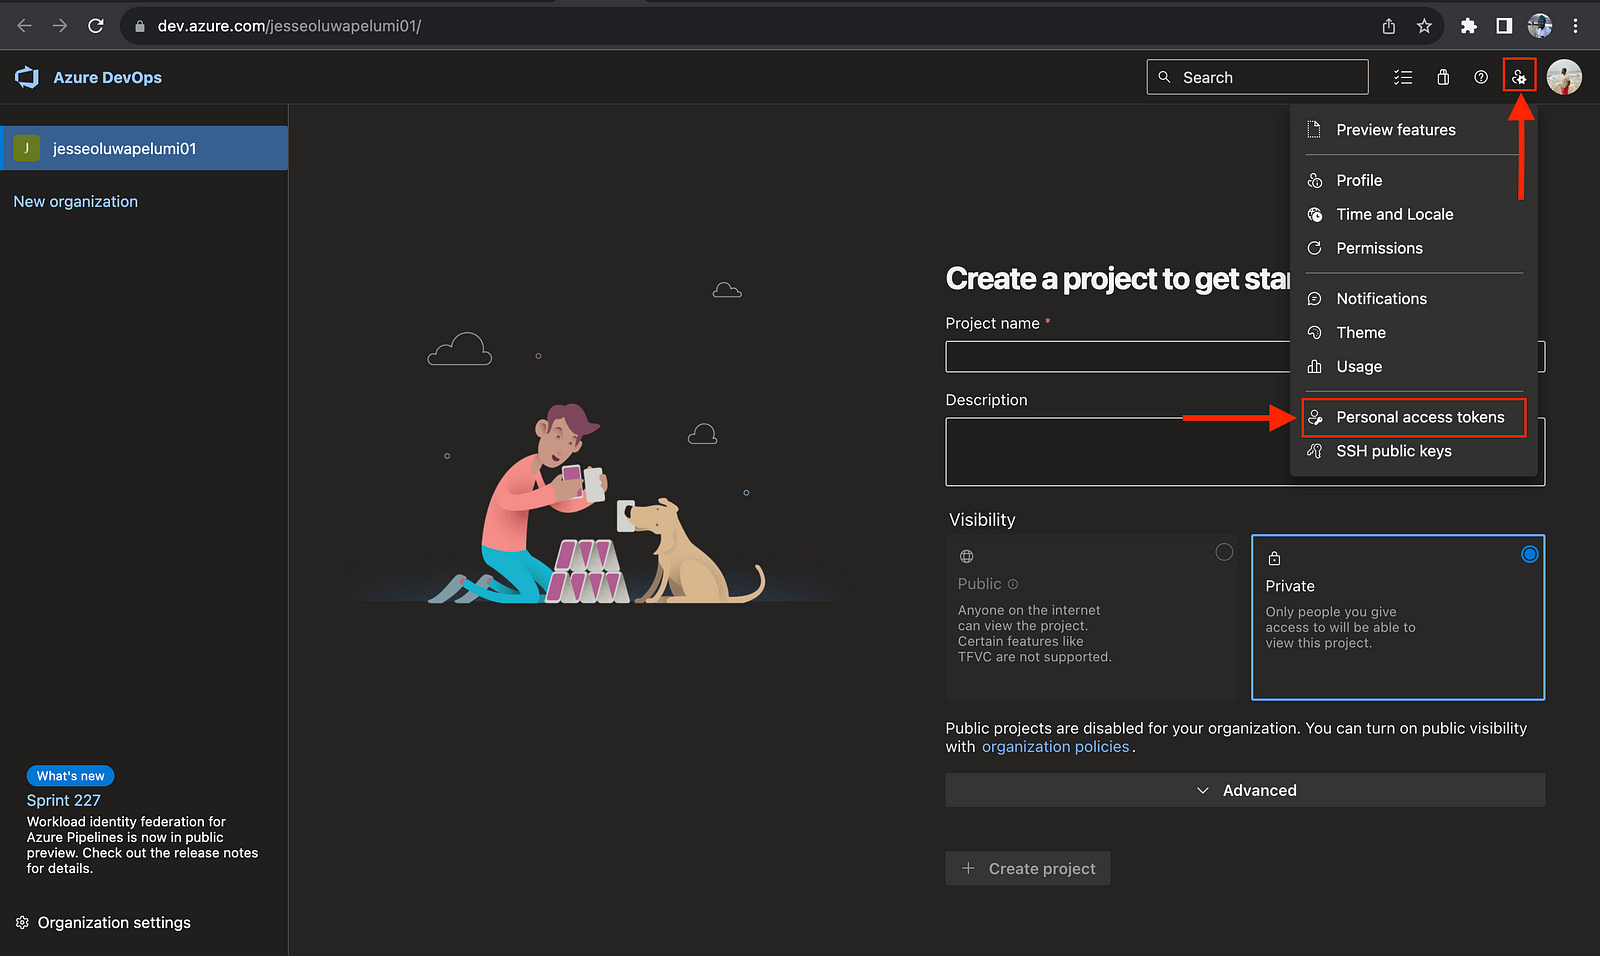
When done with the installation, proceed to Azure to create an organization under which your extension will be published. On the Azure DevOps page, sign up by clicking Start Free. To set it up faster you can Start free with GitHub.
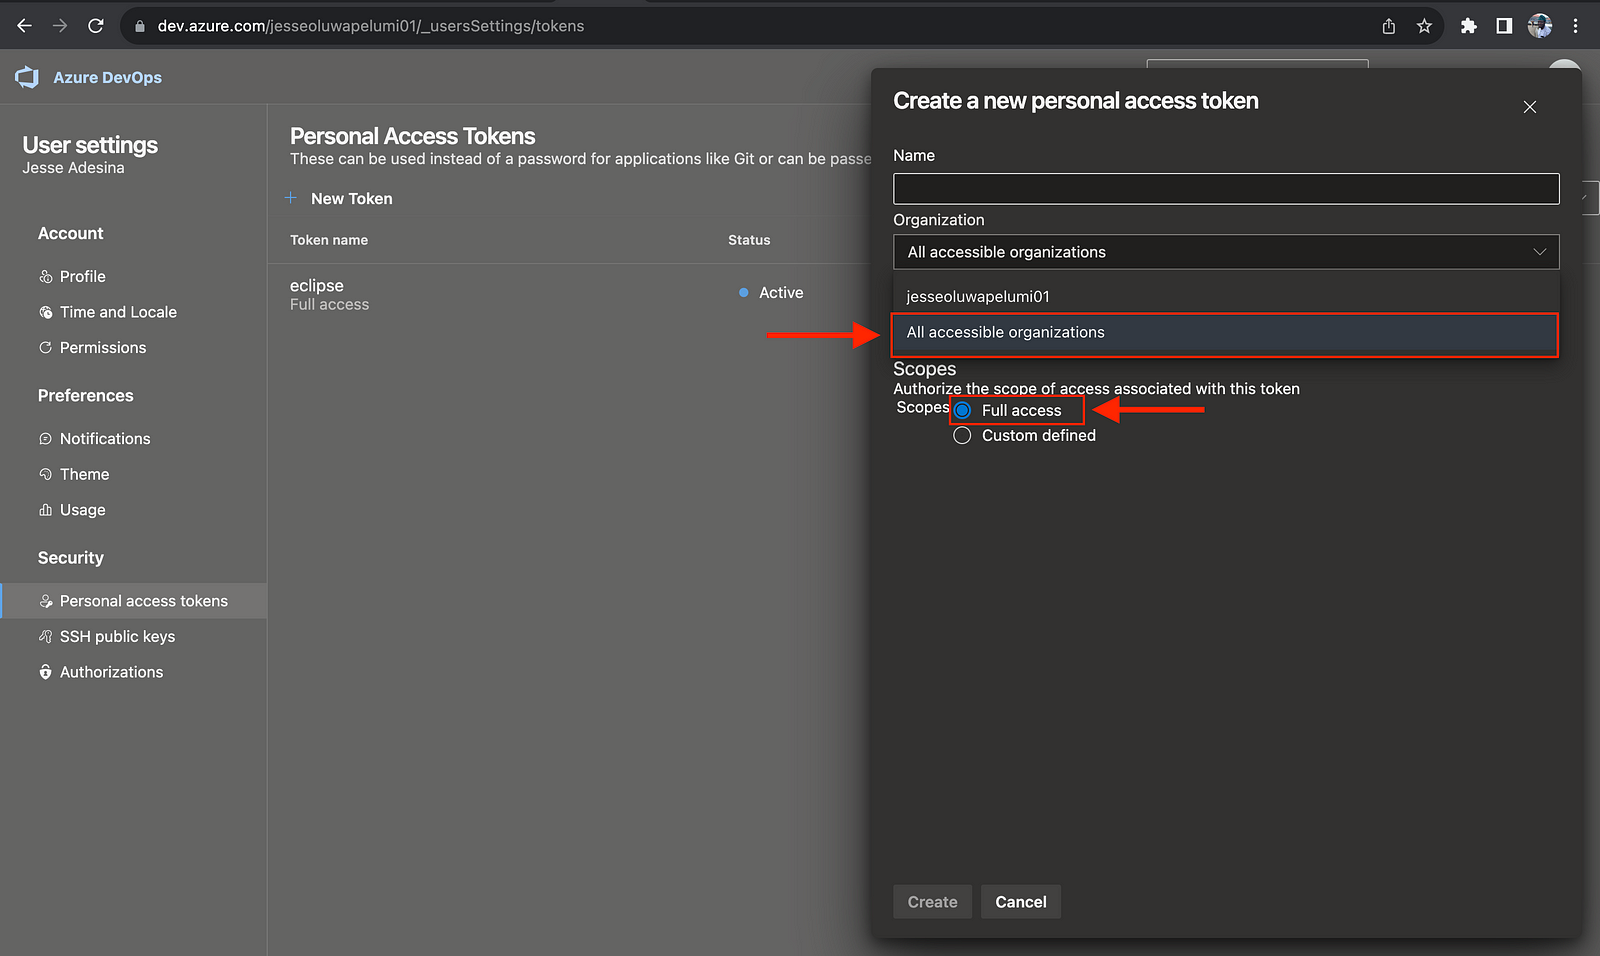
After you’ve created your organization, you’ll need a Personal Access Token for your organization. Make sure to select All Accessible Organizations and Full Access when creating your Personal Access Token.
You should copy and store your Personal Access Token in a secure location because it will eventually become hidden on the Azure DevOps page.
Once you have completed the steps above, you will need to create a Publisher on VSCode Marketplace. Fill in the necessary details, then log in to your Publisher account via the terminal using the code below
vsce login <publisher-name>
Upon successful login, package and publish your newly created theme using the codes below respectively
vsce package
vsce publish
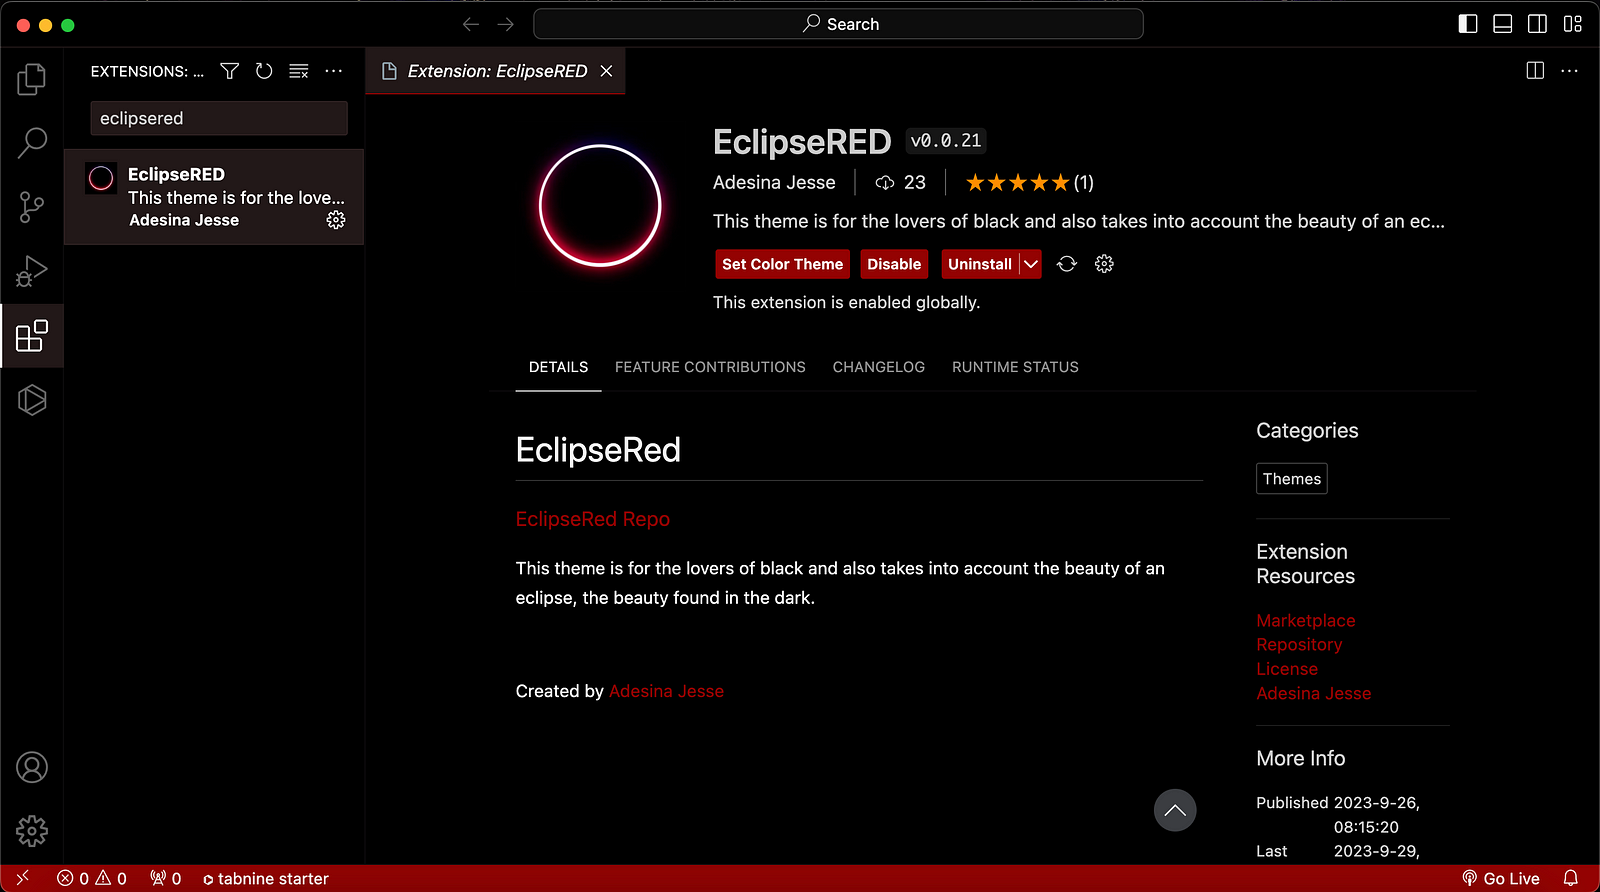
Congratulations! You have successfully created your own VSCode color theme in just a few minutes. Your theme is now ready to go live on the VSCode Marketplace. Thank you for reading this article and following the instructions. I hope you found this guide helpful. If you enjoyed this article, please support me by liking and sharing it. You can also connect with me on LinkedIn.
Thank you 🥂